
Table of Contents
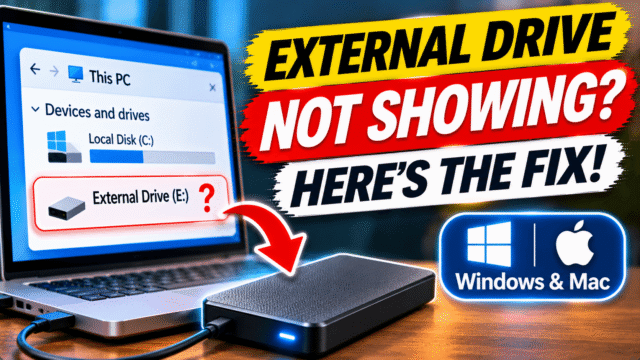
You plug in the drive with your photo backups, your work files or ten years of family videos. You hear the little connection sound, or see the light come on. But nothing appears in File Explorer or Finder.
It’s a horrible moment. The good news is that most drives that “disappear” haven’t lost anything. The computer can usually see the drive. It just hasn’t given it a drive letter, mounted it, or recognised its format.
Before you do anything, one rule matters more than all the others.
First, the golden rule: don’t format or initialise
If Windows says “You need to format the disk before you can use it”, or Disk Management offers to “initialise” the disk, or your Mac says “The disk you attached was not readable by this computer” and offers to erase it, stop.
Formatting, initialising and erasing can wipe what’s on the drive. Many people lose their files at exactly this moment by clicking the button the computer offers. Close the message and work through the steps below first. If the data is important, you can always format later, once you’ve rescued it.
Step 1: Check the physical connection
Many “missing” drives are a cable or power problem.
- Try a different cable. Cheap or worn USB cables are a common cause, especially the short ones that come with drives.
- Try a different USB port, preferably one directly on the computer rather than a hub, dock or keyboard.
- Connect it directly. Many portable hard drives draw more power than an unpowered hub or adapter can supply.
- For large desktop drives with their own power adapter, check it’s plugged in and switched on.
- Try a different computer if you have one. If the drive works there, the problem is your computer, not the drive.
Also listen to the drive. Clicking, beeping, grinding or repeatedly spinning up and stopping are signs of physical failure. If you hear these, unplug it straight away, don’t keep retrying, and if the data matters, take it to a data recovery specialist. Every extra attempt can make things worse.
Step 2 (Windows): Look in Disk Management
Disk Management shows every drive connected to your PC, including ones that don’t appear in File Explorer.
- Right-click the Start button and choose Disk Management. Or search Start for “Disk Management” and open Create and format hard disk partitions.
- Look in the lower half of the window for your drive. You can usually recognise it by its size.
What you see tells you what to do next.
The drive has no letter
If the drive shows a healthy partition but no letter such as D: or E:, Windows simply hasn’t assigned one. This is common and easy to fix, and it doesn’t touch your files.
- Right-click the partition and choose Change Drive Letter and Paths.
- Click Add, choose a letter, and click OK.
The drive should now appear in File Explorer.
The drive says Offline
Right-click the disk label on the left (where it says Disk 1, Disk 2 and so on) and choose Online.
The drive says Not Initialized, Unknown or Unallocated
This one needs care. Initialising a disk, or creating a new volume on unallocated space, prepares it for use as an empty drive. If your files were on it, don’t do either.
A drive that suddenly shows as Not Initialized or Unallocated has usually lost its partition information. The files may still be recoverable, but only if nothing new is written to it. If the data matters, stop here and use data recovery software or a professional before you change anything.
If the drive is new or you don’t need what’s on it, it’s fine to initialise it (choose GPT) and then create a new simple volume.
The drive says RAW
RAW means Windows can’t recognise the drive’s file system. It may be damaged, or formatted for a different system such as a Mac. Don’t format it. Try it on a Mac or the computer it came from, or use data recovery tools first.
The drive isn’t in Disk Management at all
Go to Step 3.
Step 3 (Windows): Check Device Manager
- Right-click the Start button and choose Device Manager.
- Expand Disk drives and look for your drive. Also check Universal Serial Bus controllers.
- If the drive has a yellow warning sign, or appears as an unknown device, right-click it and choose Uninstall device, then click Uninstall.
- Unplug the drive, restart your PC, and plug it back in. Windows reinstalls the driver automatically.
If the drive is listed as disabled, right-click it, choose Properties, open the Driver tab and click Enable Device.
You can also check for optional driver updates in Settings, then Windows Update, then Advanced options, then Optional updates.
Step 2 (Mac): Make sure Finder shows external drives
Sometimes the drive is connected but Finder is set to hide it.
- Click the Finder menu at the top of the screen, then Settings.
- On the General tab, tick External disks to show them on the desktop.
- On the Sidebar tab, tick External disks to show them in Finder windows.
Step 3 (Mac): Allow the accessory to connect
On Mac laptops with Apple silicon, macOS can ask permission before a new USB or Thunderbolt accessory connects. If you missed or dismissed the “Allow accessory to connect?” pop-up, the drive won’t appear.
Unplug the drive and plug it back in, then click Allow when asked. You can change how this works in System Settings, then Privacy and Security, under Allow accessories to connect.
Step 4 (Mac): Check Disk Utility
- Open Disk Utility (search for it with Spotlight).
- Click View in the menu bar and choose Show All Devices.
- Look for your drive in the sidebar.
What you see:
- If the drive’s volume is greyed out, select it and click Mount. Enter the password if it’s encrypted.
- If the drive appears but won’t mount, macOS may not be able to read it. A drive formatted on Windows with BitLocker, for example, won’t open on a Mac.
- If the drive doesn’t appear at all, hold the Option key, click the Apple menu and choose System Information. Under Hardware, click USB or Thunderbolt/USB4. If the drive isn’t listed there either, the Mac can’t see it physically, which points to the cable, port, power or the drive itself.
Disk Utility also has First Aid, which checks and repairs the drive. If the data is irreplaceable, copy it off first if you can, because repairs can sometimes change things on the drive.
Step 5: Check the drive’s format
A drive formatted for one system may not work fully on another:
- NTFS (common on Windows): Macs can read it but not write to it. You’ll see your files, but you can’t save or delete anything.
- APFS or Mac OS Extended (Mac formats): Windows can’t read these without extra software. The drive may show as RAW or ask to be formatted on Windows. Don’t format it.
- exFAT: works on both Windows and Mac. If you move a drive between the two, this is the best format. But reformatting erases the drive, so copy your files somewhere safe first.
Step 6: Encrypted drives
If the drive was encrypted, it won’t show its files until you unlock it.
- BitLocker To Go on Windows: Windows asks for the password when you plug it in. If it doesn’t, open File Explorer, right-click the drive and choose Unlock Drive.
- Drives from some makers, such as WD and Seagate, may use the maker’s own security software. Install the maker’s app to unlock it.
If you’ve forgotten a BitLocker password, you may be able to use the recovery key saved to your Microsoft account.
When to stop and get help
Stop trying fixes yourself and contact a data recovery service if:
- The drive clicks, beeps, grinds or keeps disconnecting
- It was dropped or got wet
- It doesn’t appear in Disk Management, Device Manager or System Information on any computer
- The files are irreplaceable and the drive shows as RAW, Unallocated or Not Initialized
Avoid opening the drive yourself, and be careful with free “recovery” tools that ask you to format or repair the drive first.
Protect yourself next time
An external drive is a backup, not the only copy. Keep your most important files in at least two places, such as the external drive plus a cloud service. Drives fail without warning, and the best fix is never needing one.
Quick Answers
Why is my external hard drive not showing up?
Common causes are a faulty cable or port, not enough power, a missing drive letter on Windows, Finder settings or an unaccepted accessory prompt on a Mac, a format the computer can’t read, or a failing drive.
How do I make my external drive show up in File Explorer?
Open Disk Management, find the drive, right-click its partition and choose Change Drive Letter and Paths, then Add, and pick a letter.
Should I format my drive if Windows asks me to?
Not if you need the files on it. Formatting erases the drive. Close the message and try the drive on another computer or use data recovery first.
Why does my external drive show in Disk Utility but not Finder?
It may not be mounted, or Finder may be set to hide external disks. Select it in Disk Utility and click Mount, then check Finder’s settings.
Why can’t I save files to my external drive on a Mac?
The drive is probably formatted as NTFS, which Macs can read but not write. Use exFAT if you need to use the drive on both Windows and Mac.
What does it mean if my drive clicks or beeps?
It’s usually a sign of physical failure. Unplug it, stop using it, and contact a data recovery service if you need the files.