
Table of Contents
IBM Cloud Private is a platform for developing & managing the on-premise applications. It’s an integrated environment which includes Kubernetes, image repo, console & monitoring.
It’s quite often that we see much variation in demand for the services running in the cloud. At times, the demand is very high & at other times, it’s as low as idle. In such cases, instead of falling short of the resources or holding on to the unused resources – we can do automatic scaling in the IBM Private Cloud which used the horizontal pod auto-scaling. This dynamically controls the pod numbers in your environment with response to the CPU usage.
To ensure stabilization during this auto-scaling, it ensures that a certain time has passed after the previous scale up or scale down before proceeding with the newly requested scaling.
Because it is based on CPU usage, here is how it works
- Scale up: Current_CPU_UT >Target_CPU_UT *110%;
- Scale down: Current_CPU_UT<Target_CPU_UT*90%.
Step 1: Installation
Follow the instructions on setting up the IBM private cloud. Once it’s ready, follow the next steps.
Step 2: Create a service
- Create a php-server application
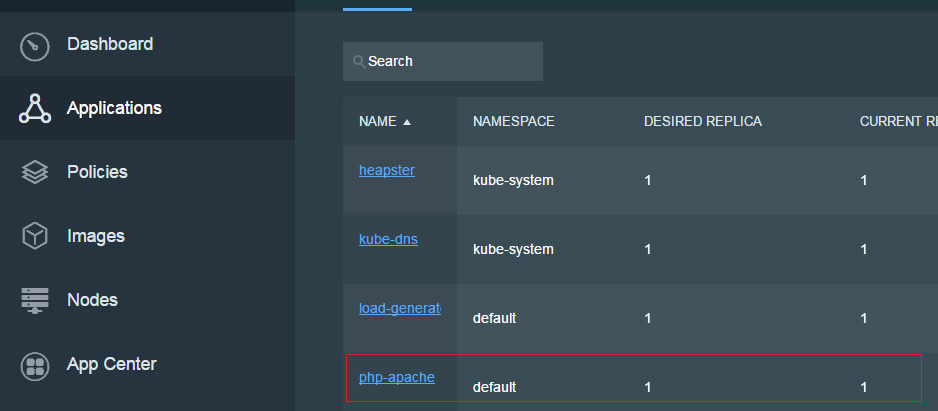
- From the navigation menu, select Applications.
- Select Deploy Application.
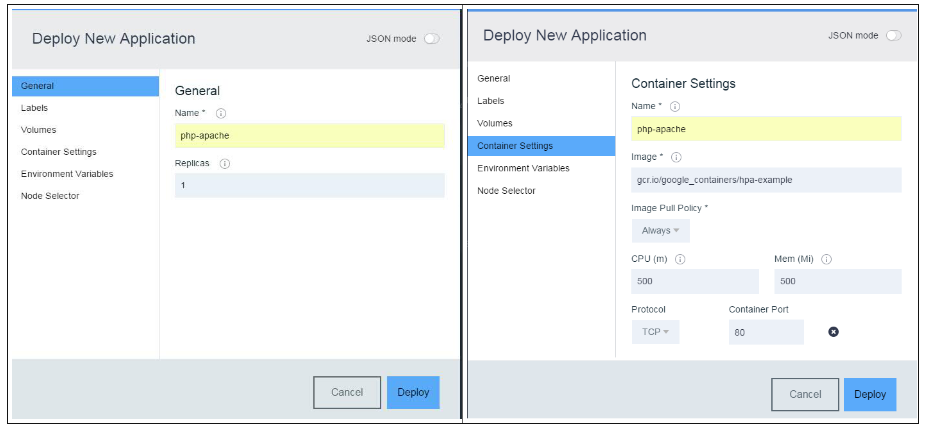
- On General tab, provide an application name.
- On Container Settings tab, provide a container name, image name, and port.
Application name: php-apache
Container name: php-apache
Image name: gcr.io/google_containers/hpa-example
Container port: 80
- Select Deploy.
Check the Applications home page, to verify that the php-apache application is successfully deployed.
Step 3: Now, expose the php-apache application as a service
- From the navigation menu, select Applications.
- For the php-apache application, select Action->Expose.
- Provide a port and a targetPort.
- Select Expose

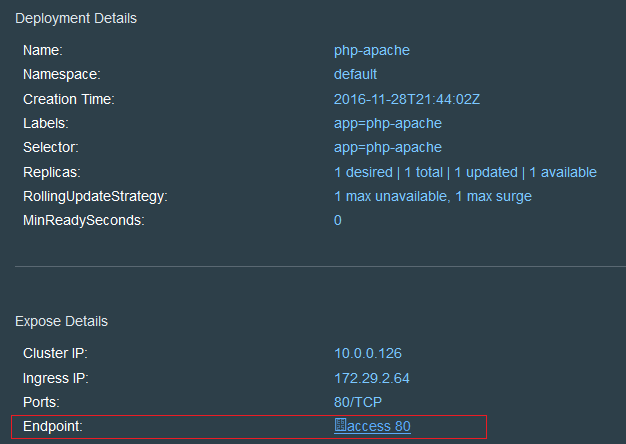
Click on the php-apache application. From the expose details section, click the endpoint access link. If a web page displays with the text “OK”, then the service is successfully created.
Step 4: Create new policy for the service
- From the navigation menu, select Policies.
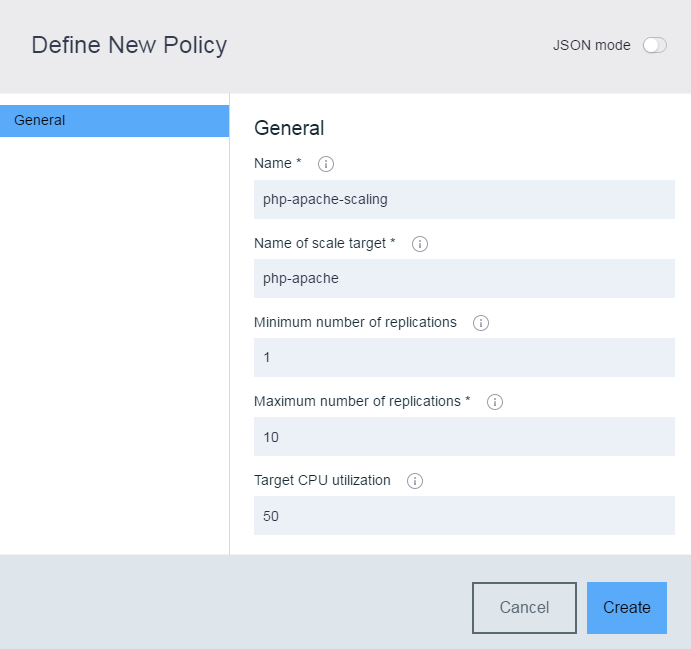
- Select Define Policy.
- Provide a name for the policy, the target application, the maximum and a minimum number of replicas as well as a target CPU utilization.
Policy name: php-apache-scaling
Target application: php-apache
Minimum number of replicas: 1
Maximum number of replicas: 10
Target CPU Utilization: 50
- Select Create
Step 5: Deploy a load-generator
This “load-generator” application is used to rapidly increase the CPU demand in your cluster.
- From navigation menu, select Applications.
- Select Deploy Application.
- Switch to JSON mode.
- Use the following in the editor window
{

"apiVersion": "extensions/v1beta1",
"kind": "Deployment",
"metadata": {
"name": "load-generator",
"namespace": "default",
"labels": {
"run": "load-generator"
}
  },

"spec": {
"replicas": 1,
"selector": {
"matchLabels": {
"run": "load-generator"
}
 },

"template": {
"metadata": {
"labels": {
"run": "load-generator"
}
  },

"spec": {
"containers": [
{
"name": "load-generator",
"image": "busybox",
"args": ["/bin/sh"],

"resources": {},
"terminationMessagePath": "/dev/termination-log",
"imagePullPolicy": "Always",
"stdin": true,
"tty": true
}
],

"restartPolicy": "Always",
"terminationGracePeriodSeconds": 30,
"dnsPolicy": "ClusterFirst",
"securityContext": {}
}
},

"strategy":
"type": "RollingUpdate",
"rollingUpdate": {
"maxUnavailable": 1,
"maxSurge": 1
}
}
}
}
Then select Deploy & locate the nod to ensure this “load” application pod is running.
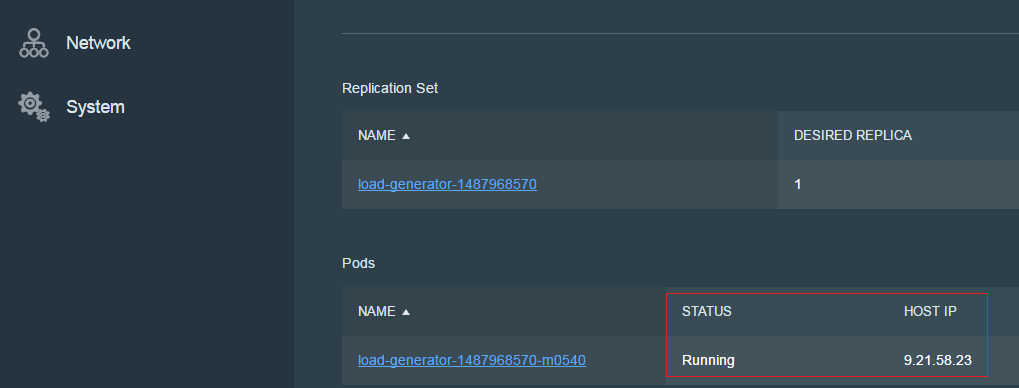
Step 6: Scape up php-service using load-generator
From a terminal window, log in to the worker node where the load-generator pod is running.
Open a second terminal window on the same worker node. Having two terminal windows will allow for a faster ramp up of CPU usage.
On both terminal windows, get the container id for the “load-generator” application.
$ docker ps |grep busybox
986f6378f0e8 busybox “/bin/sh” 2 minutes ago Up 2 minutes
k8s_load-generator.cbf23a7f_load-generator-1487968570-ijlx9_default_019a3ddb-92a0-11e6-8105-32d2bf3e6494_9a92382d
On both terminal windows, raise the load.
$ docker exec -it 986f6378f0e8 /bin/sh
/ # while true; do wget -q -O- http://php-apache.default.svc.cluster.local; done
Step 7: View the status
From the navigation menu, select Policy.

In this example, the current CPU UT is now 170. Based on the HPA algorithms and the target CPU utilization conditions, this will trigger a scale-up of the replicas of pods to 4. The numbers will vary as per the auto-scaling algorithm. Read more on Github
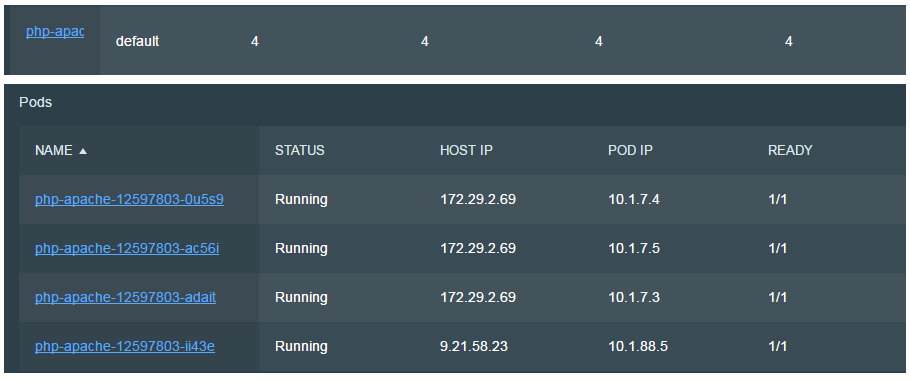
Step 8: View the application status
From navigation menu, select Applications. Then, select the php-server application.
Scroll down to the “Pods” section & here you will see that the number of pods have scaled up to meet the demands.
Step 9: Scaling down
From one of the terminals, do ctrl-c to stop the application. Now wait for few 10-15 minutes, based on the algorithm, it will trigger the scaling down of pods to 2. The system is kept stable while this is happening.
Now if you do the same from second terminal & wait for few minutes, the scale down will bring 2 pods to 1 – which is a minimum number of replica we specified in the policy.
As we’ve seen, we can adjust the number of pods or drop them as needed. You can save on billing if your scale down the development & testing environments which are less likely used on the weekends. This will also ensure you have enough computing power when you need it the most.


