
Table of Contents
You move abroad, open the App Store to grab an Indian fintech app or a regional OTT platform you used every day back home, and get slapped with “This app is not available in your country.” If you’re reading this, you’ve probably seen that message more times than you’d like.
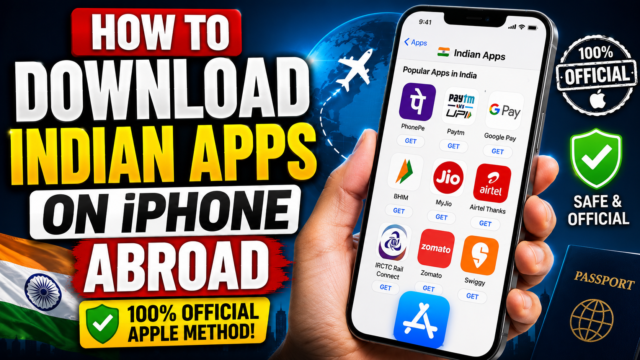
Here’s what most people don’t realize: you don’t need a jailbreak, a sketchy sideloading tool, or a VPN trick that puts your Apple account at risk. Apple has a completely official, built-in way to switch your App Store to India’s storefront, and it works from anywhere in the world. I’ll walk you through the exact process, what you need cleared before you start, and the one payment detail that trips almost everyone up.
Why a VPN Won’t Fix This
Let’s kill the most common misconception first. A VPN does not change your App Store region. Your storefront is tied to the country registered on your Apple Account, not to your IP address. You can connect to a Mumbai server all day long and the App Store will still show you the catalogue of whatever country your account is set to.
This is actually good news. It means the real fix doesn’t involve location spoofing at all. You change one account setting, and Apple itself switches you to India’s catalogue, whether you’re sitting in New Jersey, Dubai, or Melbourne.
What You Must Clear Before Switching
Apple blocks the country change until your account is in a clean state. Skip any of these and the switch simply won’t go through, usually with a vague error that doesn’t tell you why. Sort these four things first.
1. Spend your Apple Account balance down to zero
Any leftover store credit blocks the change. Spend it on apps or media until it’s gone. If your remaining balance is smaller than the cheapest item you can buy, contact Apple Support and ask them to clear it.
2. Cancel subscriptions and let them run out
Apple Music, iCloud+, Apple TV+, and any in-app subscriptions billed through Apple all need to be cancelled, and here’s the part people miss: cancelling isn’t enough. The paid period has to fully expire. If your iCloud+ renews on the 15th and you cancel on the 2nd, you’re waiting until the 15th.
3. Clear pending pre-orders, rentals, and refunds
Any active movie rental, pre-order, Season Pass, or store credit refund still processing will block you. Check your purchase history in Settings and cancel or wait out anything open.
4. Leave Family Sharing
Everyone in a Family Sharing group has to be on the same country storefront, so you can’t switch while you’re in one. Leave the group first. If you’re the organizer, you’ll need to disband it entirely.
The Step-by-Step Switch to India’s App Store
Once you’re clear, the actual change takes about two minutes.
- Open Settings on your iPhone and tap your name at the top.
- Tap Media & Purchases, then View Account. You might be asked to sign in again.
- Tap Country/Region, then Change Country or Region.
- Select India from the list.
- Review India’s Terms and Conditions, tap Agree in the top corner, then confirm with Agree again.
- Enter a payment method and an Indian billing address, then tap Next.
That billing address needs to be a real Indian address you have permission to use. A family member’s home or your previous residence works fine. Once you confirm, your App Store flips to India’s catalogue and the missing apps show up in search.
The Payment Method Catch (Read This Before You Start)
This is where I’ll be straight with you, because a lot of guides get it wrong.
When you change the country on an existing Apple Account, Apple may require a valid payment method for the new country before it completes the switch. Sometimes a “None” option appears on the payment screen, and if it does for you, great, take it. But it is not guaranteed, and plenty of people switching to India are asked for an Indian card.
If you hit that wall and don’t have an Indian payment method, Apple’s own recommended route is a different one: create a new, separate Apple ID set to India. During setup of a fresh account, selecting None as the payment method is reliably available. You then sign into the App Store (just the App Store, not iCloud) with that Indian Apple ID whenever you need Indian apps, and keep your main account for everything else. Two minutes of switching between accounts, zero risk, and no payment details needed for free apps.
If you actually want to pay for Indian apps or subscribe to Indian services, you’ll need an Indian payment method either way, such as a card issued by an Indian bank or a supported local payment option.
What Happens to Your Existing Apps
Nothing dramatic. Every app already on your phone keeps working after the switch. What changes is updates and redownloads: if an app from your old country’s store isn’t available in India’s catalogue, you won’t be able to update it or reinstall it if you delete it.
So before switching, take stock of anything region-locked you depend on from your current country’s store. And know that the door swings both ways. You can switch back whenever you want, as long as you clear the same four requirements again: zero balance, no active subscriptions, nothing pending, no Family Sharing group.
Quick Answers
Do I need to change the region on all my Apple devices?
No. Change it once and it syncs to every device signed into the same account.
Can I keep two Apple IDs in different countries?
Yes. Each needs its own billing address for its country, and you sign in and out to switch between them. This is the cleanest long-term setup for NRIs who want both catalogues.
Will my iCloud photos and data be affected?
Your iCloud data stays with your Apple Account. If you use the two-account method, keep iCloud signed into your main account and only use the Indian ID for the App Store.
Is this against Apple’s rules?
No. This is Apple’s own documented process, done entirely inside your account settings. There’s no ban risk because there’s no trick involved.
Why does Apple make this so tedious?
The system is built around people genuinely relocating, not casual region hopping. The housekeeping requirements exist so billing, subscriptions, and refunds don’t break mid-switch.
The Bottom Line
Getting Indian apps on your iPhone from abroad comes down to one of two official paths. Clear the four requirements and switch your existing account’s country to India, or create a fresh Apple ID set to India with no payment method attached. Both are fully supported by Apple, neither touches a VPN or a workaround, and the whole thing costs you nothing but fifteen minutes of account housekeeping.